How to Do Intelligent Setup
This document is mainly to show you how to do intelligent setup for Linsn LED screen control system. The following steps are applying to normal modules.
1. Click “ Screen Configuration”—click” Receiver” in the interface of “Hardware Setup”—click” Intelligent setup” , as follows
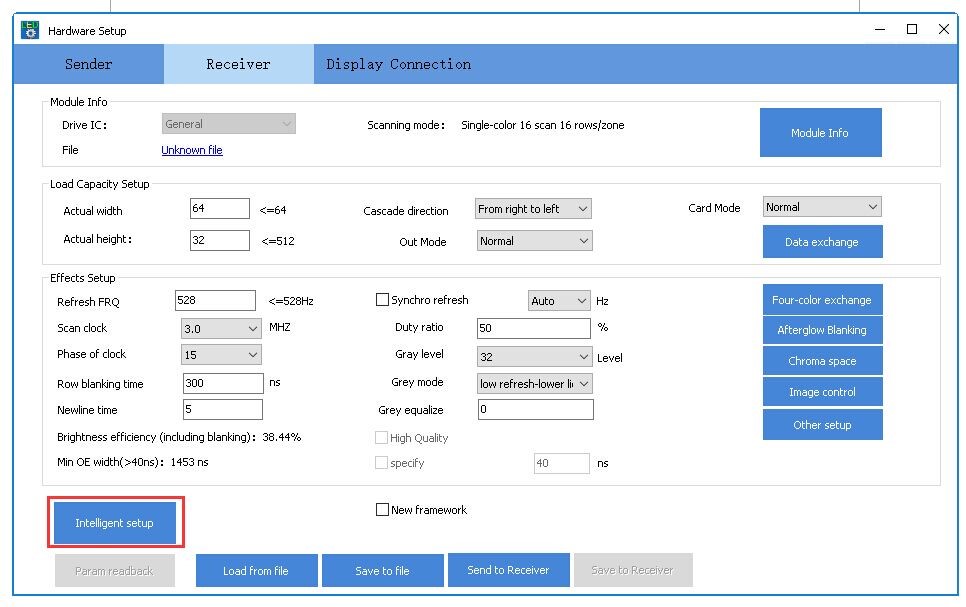
2. After clicking” Intelligent setup”, you will see the following steps:
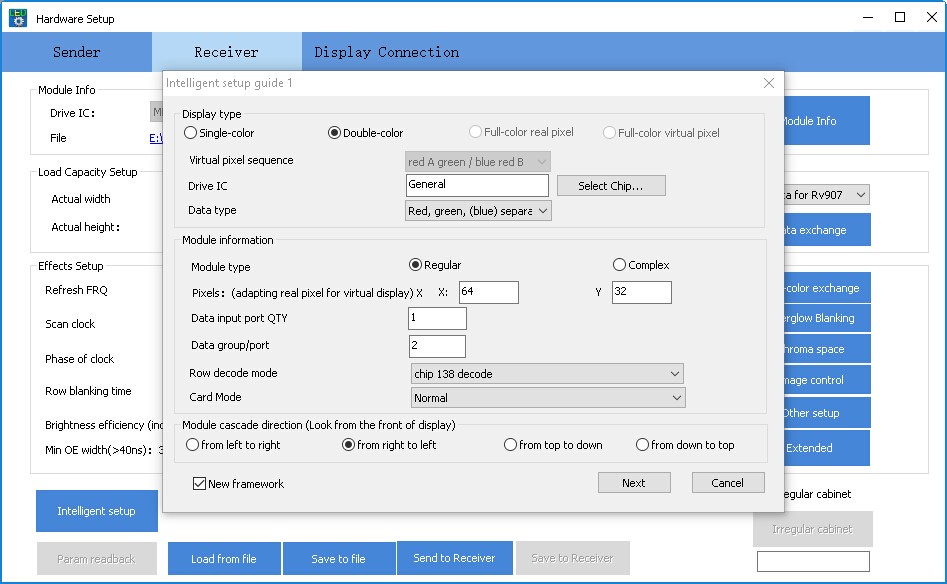
1) Intelligent setup guide 1
Pay attention to those marked in red. Others don't needs to be changed in this page.
Display type: Choose this according to your screen
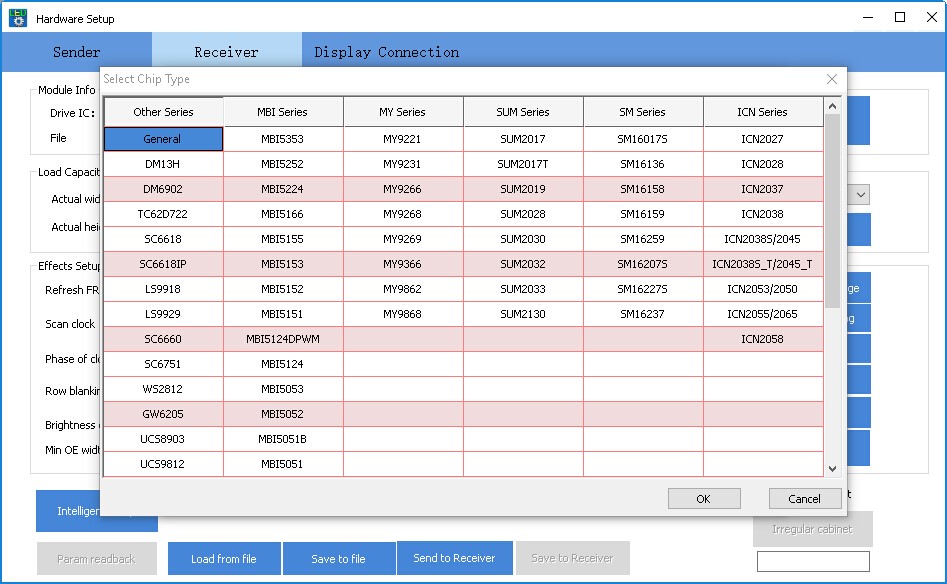
Driver IC: Check this IC on the back of your module, and choose the corresponding option in the software, like MBI5153 or ICN2053, etc. If you don’t find the exact IC model, you can just select “General”.
Pixel X/Y: X means the actual width of one module (in pixel)
Y means the actual height of one module (in pixel)
Data input Qty: The quantity of the input ports on the module
Data group: Check how many sets of R; G; B signal that each input port has.
Row decode mode: Check the type of the decode IC on the back of the module (74HC138 is the regular one).
Module cascade direction: Check how the modules connect (viewing from the front of the LED screen)
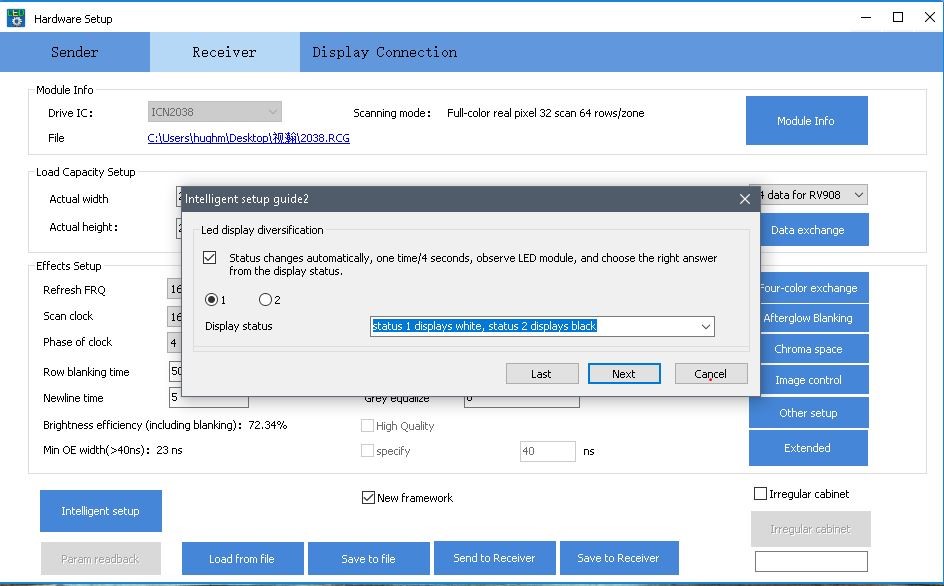
2) Intelligent setup guide 2
Click 1: to see what color the first module (normally on the upper right of the LED screen) displays
Click 2: to see what color the first module (normally on the upper right of the LED screen) displays
After comparing status1 & status2, choose the corresponding option in LedStudio
For example, Choose “status 1 displays white, status 2 displays black” according to the above situation, and click “Next”.

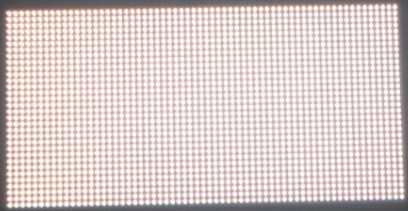
Status1 Status2
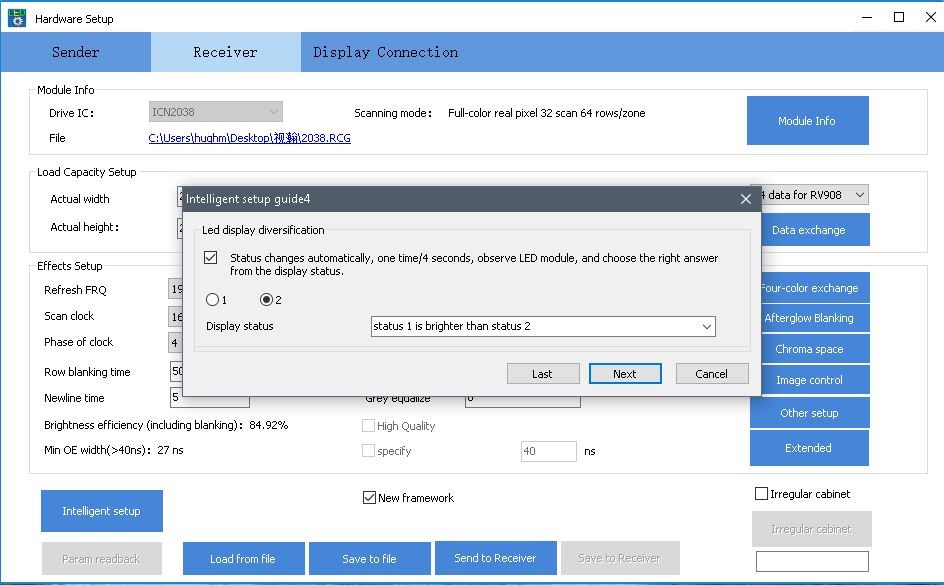
3) Intelligent setup guide 4
Click1&2 and then compare the status of them.
Choose the corresponding options according to the actual change of the first module (normally on the upper right of the LED screen)

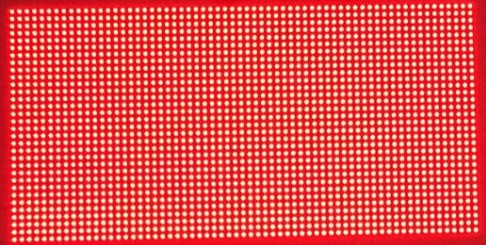
Status1 Status2
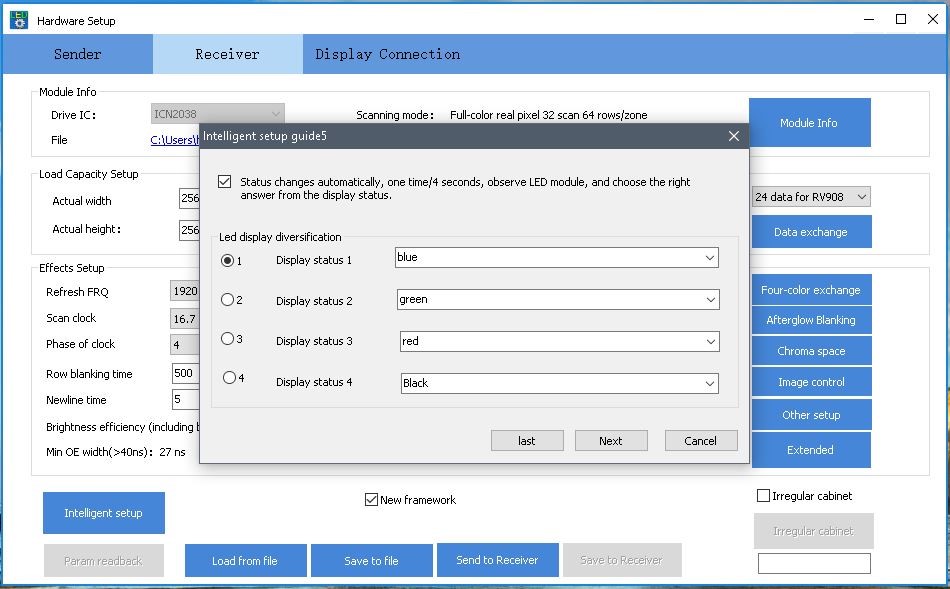
4) Intelligent setup guide 5
Click 1; 2; 3; 4 and then compare status of them
Choose the corresponding options according to the actual change of the first module (normally on the upper right of the led screen)
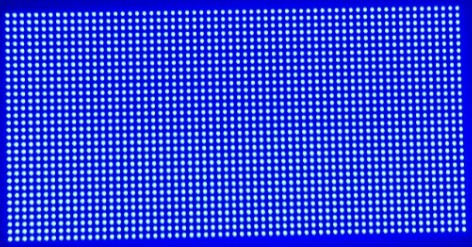
Status1 Status2
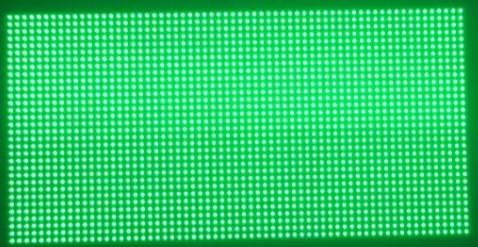
Status3 Status4
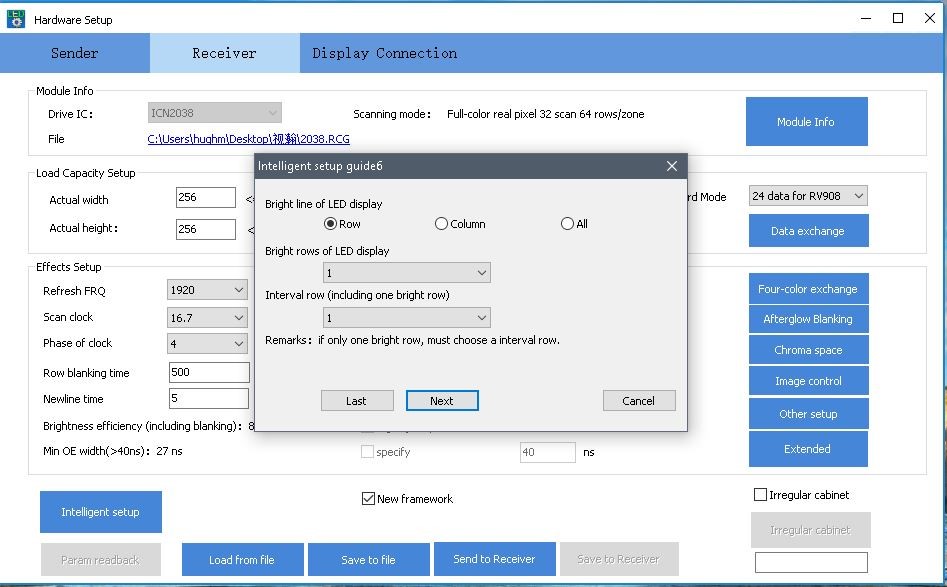
5) Intelligent setup guide 6
Bright line of LED display: choose” row”
Bight rows of LED display: check the actual bight rows of the upper right module
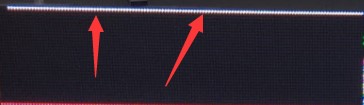
Internal row (including one bright row): means the quantity of the black rows between bright rows, and the final value for this option should plus one.
For example, there are 2 bright lines showing on the module, and between the two lines there are 3 black rows. Therefore, you need to choose 2 for bright rows option and 4(3+1) for interval row option.
If there is just one line, choose 1 for bright rows option and 1 for interval row option.
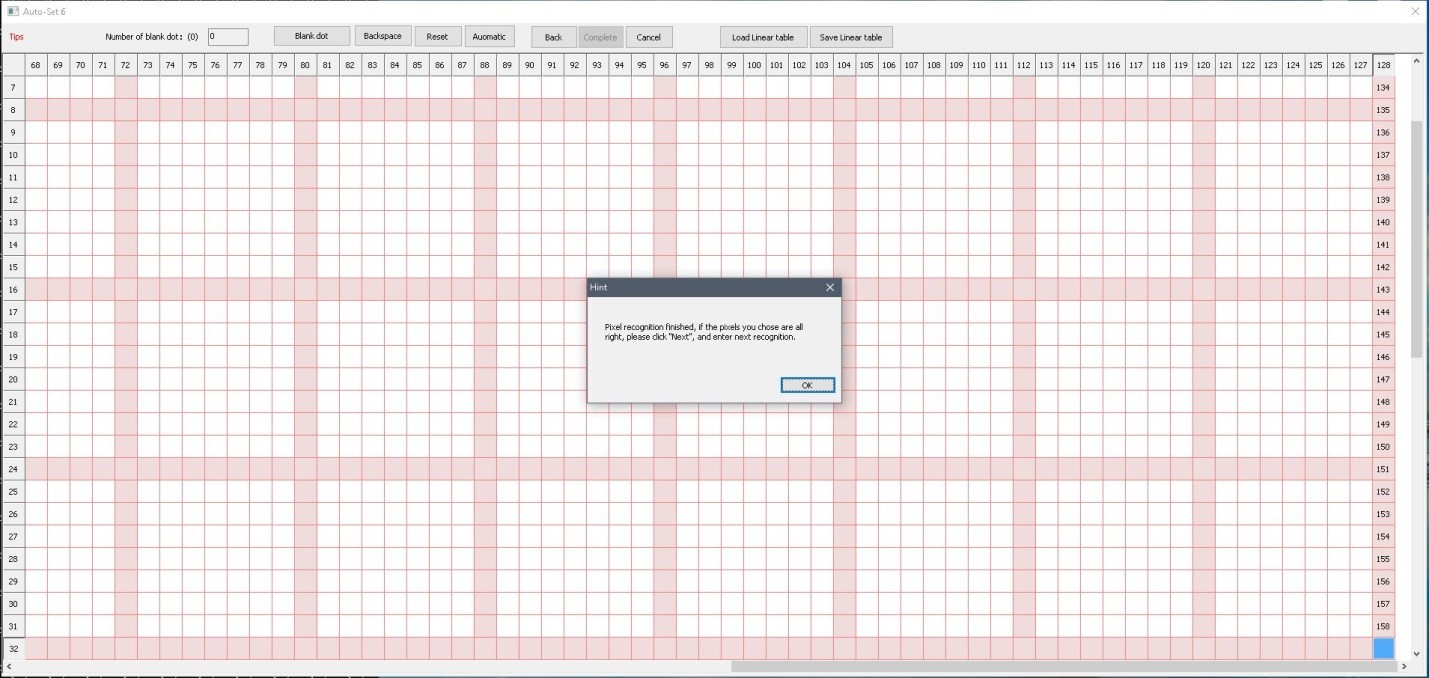
6) Intelligent setup guide 7
Locate the blinking pixel on the first module, and mark it in the software by clicking the corresponding position. Follow the track of blinking pixel until “pixel recognition finish….” pops up, click “OK” and “Complete”
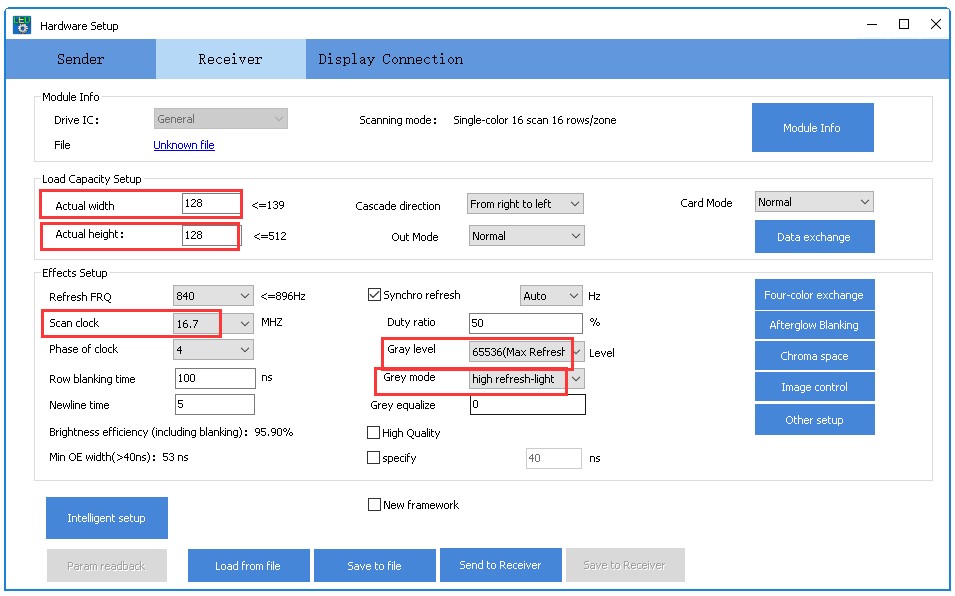
3. After finishing guide7, go back to the interface of “Receiver”
Pay attention to those marked in red
Actual width: the actual width (in pixel) that one receiving card loads
Actual height: the actual height (in pixel) that one receiving card loads
Ps: If there are more than one receiving card in your screen, and they load different pixel, input the greater value for the actual W&H
Scan clock: usually from 16.67 to 18.75
Gray level: Normally choose 65536(Max refresh)
Grey mode: Normally choose high refresh-light
4. After finishing guide7, go back to the interface of “Receiver”
Pay attention to those marked in red
Actual width: the actual width (in pixel) that one receiving card loads
Actual height: the actual height (in pixel) that one receiving card loads
Ps: If there are more than one receiving card in your screen, and they load different pixel, input the greater value for the actual W&H
Scan clock: usually from 16.67 to 18.75
Gray level: Normally choose 65536(Max refresh)
Grey mode: Normally choose high refresh-light
Please do not try the above procedrue if you are not familar with Linsn LED screen control system.